Frequently Asked Question
Linking Scanned Timesheets in Pulse
Last Updated 9 years ago
Before linking scanned timesheets, you will need to upload the files to the server. If you haven't yet done uploaded any scanned timesheet documents, view this page for guidance.
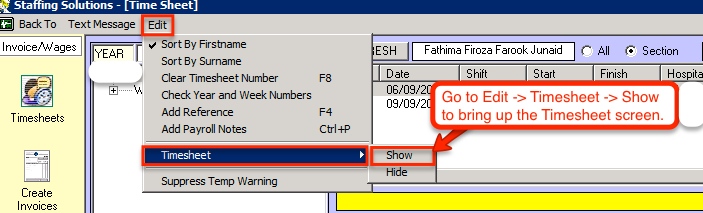
Go to Edit -> Timesheet -> Show to display the scanned timesheets screen.
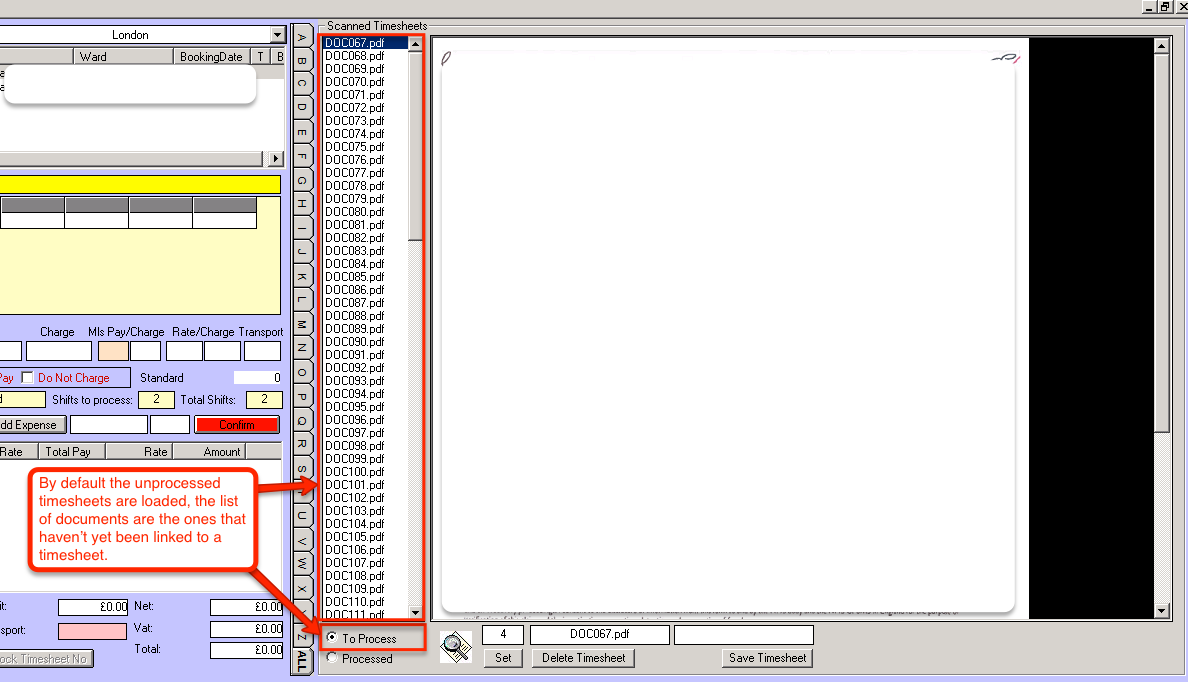
The Scanned Timesheets screen will appear on the right of the screen.

The unprocessed timesheets are loaded by default.
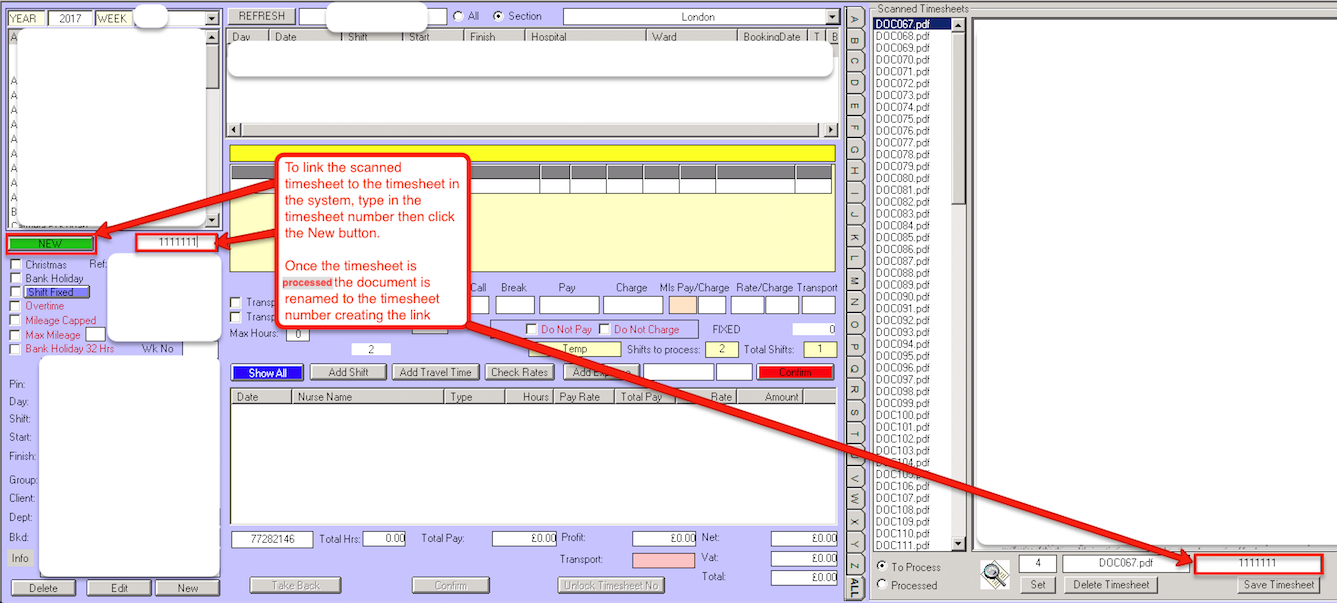
To link the scanned timesheet document, you will need to select the staff member in the list on the left, then select the associated timesheet in the scanned timesheets list. When you enter the timesheet number before creating it, the name of the scanned document will also update. Clicking the green New button creates the link between the scanned timesheet document and the timesheet in the system.
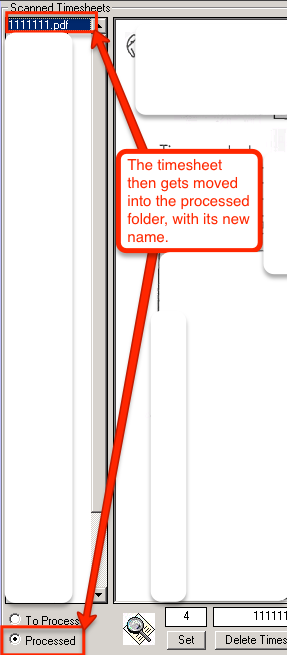
When the timesheet is created, the scanned timesheet document is saved under the "Processed" tab with it's associated timesheet number as the file name.
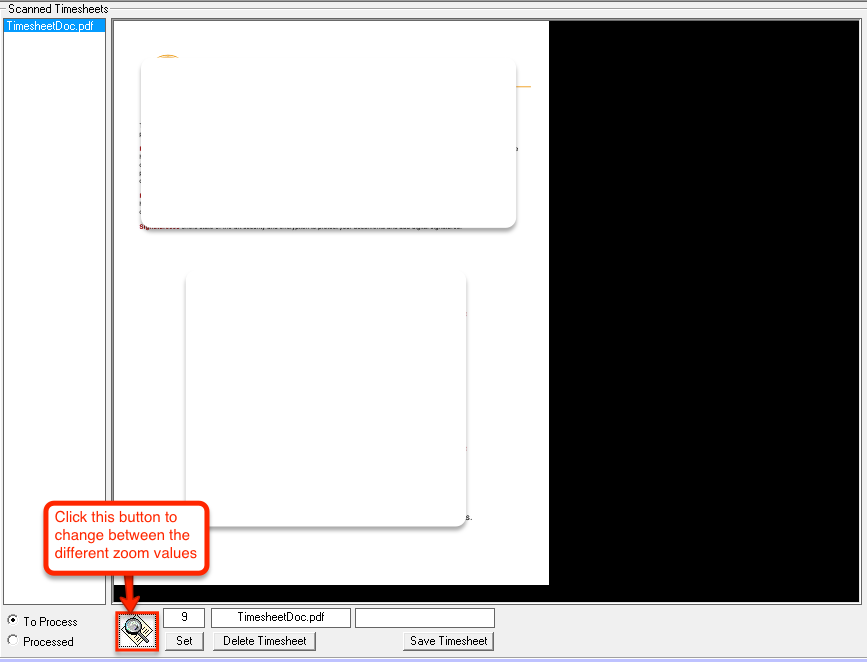
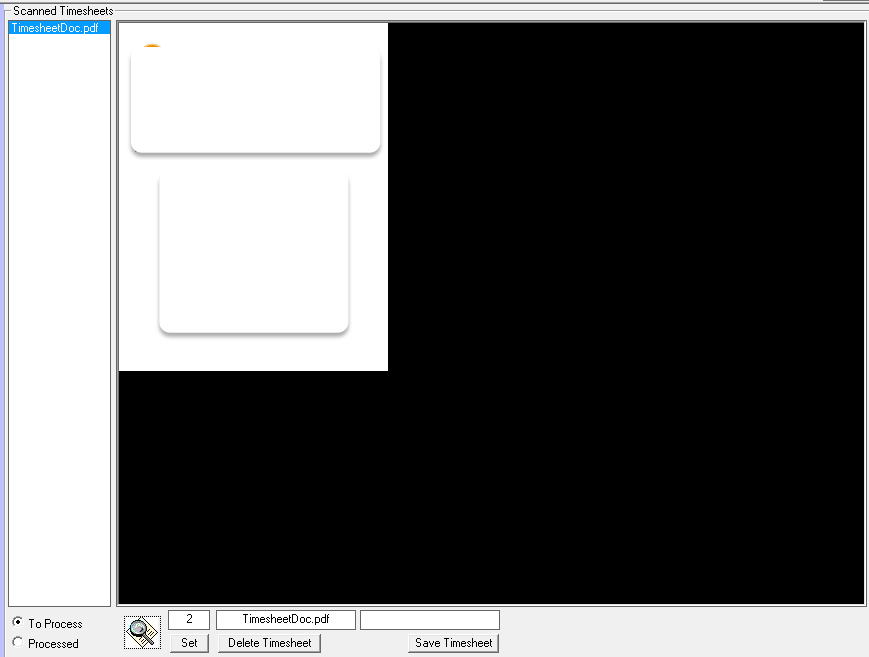
There are multiple values so you can view the whole page, or you can zoom in to see the text a bit easier.

Go to Edit -> Timesheet -> Show to display the scanned timesheets screen.
The Scanned Timesheets screen will appear on the right of the screen.
The unprocessed timesheets are loaded by default.
To link the scanned timesheet document, you will need to select the staff member in the list on the left, then select the associated timesheet in the scanned timesheets list. When you enter the timesheet number before creating it, the name of the scanned document will also update. Clicking the green New button creates the link between the scanned timesheet document and the timesheet in the system.
When the timesheet is created, the scanned timesheet document is saved under the "Processed" tab with it's associated timesheet number as the file name.
How do you zoom in on the document?
If you're having trouble reading the scanned timesheet document, you can change the zoom value by clicking the zoom button:There are multiple values so you can view the whole page, or you can zoom in to see the text a bit easier.