Frequently Asked Question
How can I add a new section?
Last Updated 9 years ago
Prerequisite Checks
To start creating a new section, you must first navigate to “SetUp”, located in the dropdown menu on the left of the screen. From there you will see a list of options. Select “SetUp”.
Before you continue you will need to check the numbers of your current section. To do this, click the section name on the bottom grey bar of the screen, near the bottom right corner. After you’ve clicked that, a window will appear showing a list of your current sections. You will need to take note of the values next to the name of the section, more specifically, you’ll need to remember the highest value out of the whole list. In our example image it is 100. Note: Yours will most likely be a different number, unless you only have the 2 basic sections as seen in the image below.
Creating The Section
You will now need to click the “Edit Section” button located in the light blue bar on the left side of the screen.
Once you’ve clicked that the Edit Section window will appear.

You will now need to click the “Add New Section” button in the top left of the window.
Once you’ve clicked that, a message box will pop up asking you to enter a number for the section. You will need to refer to the highest section value as mentioned previously. The section number will be your highest section value plus 100, so for our example our new section number would be 200. Note: Your value will be different if you have multiple sections already created.
Once you’ve entered the number and clicked the OK button another window will appear asking for a name for the section. For this you’ll need to enter a meaningful name for your new section, more often than not, users name sections after the city where their office is based, but you can call it whatever you feel fits.

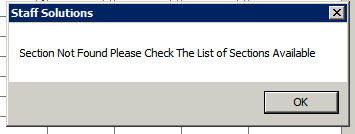
After you’ve entered your new section name, a message box will appear, you can click the OK button on that. (Even though the message says that the section is not found, it does actually exist)
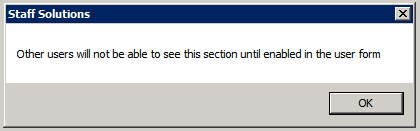
Another message box will appear after that warning you that your users will not be able to see the section until you give them access to it. Click here to learn how to give users access to sections.
Setting Up The New Section
In the top right of the Edit Section window you will notice a drop down box with a section name in it. Click that drop down box and your new section should appear in the list.
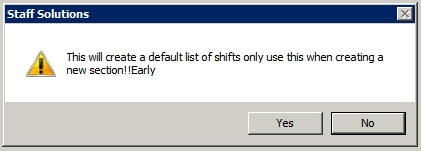
Once you’ve selected your new section from the drop down box and it has loaded, you will need to click the “Load Default Shifts” button at the top of the window.
After you’ve clicked the Load Default Shifts button a warning will appear, telling you that this button should only be used when creating a new section, because the process will overwrite any existing default shifts.
After you’ve clicked “Yes” on that warning message, the default shifts should be loaded in the list in the middle of the window.
You will notice that alongside the “ShiftName” column, there are multiple other columns. The “OptionSel” column basically means that if the box is checked this default shift will be used in the system.


Uncheck the box if you don't want that particular shift to be included.
The “SpecialDt” field is used for special dates, such as New Years day, Christmas day, and bank holidays.
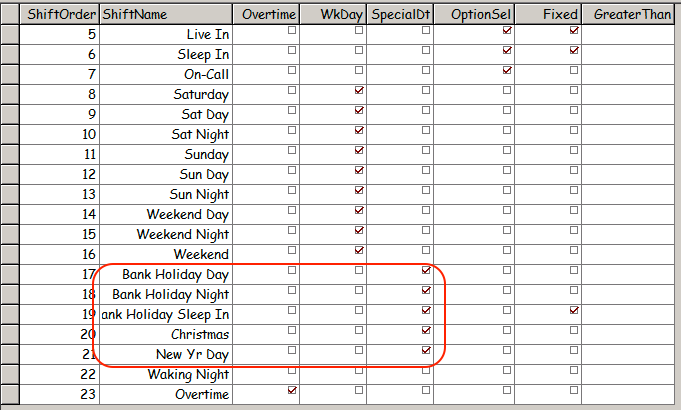
The “WkDay” field is used for determining which default shifts will be used on week days.

If you feel like you have too many default shifts in the list, you can delete the ones you won’t use. To do this you must first select the shift that you want to delete from the list, then press the “Delete Shift” button near the bottom/middle of the window.
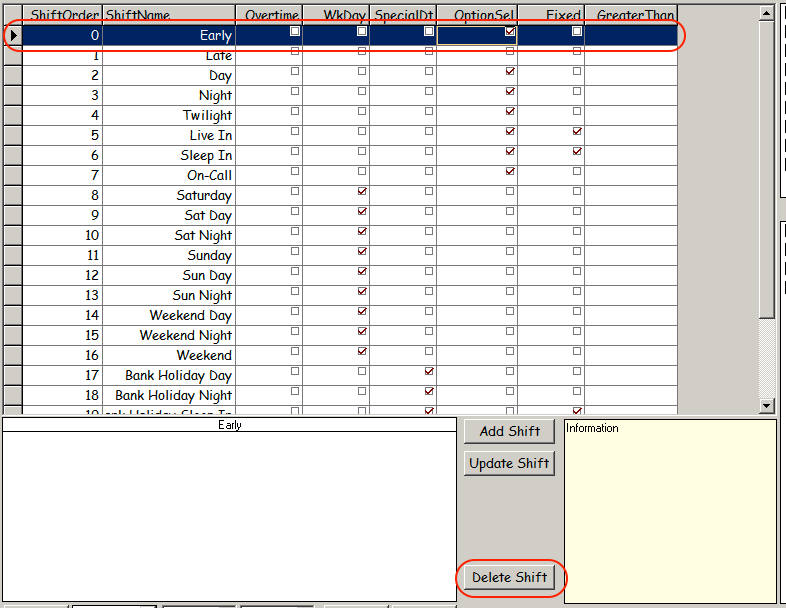
Once you’ve clicked that button, a confirmation message will pop up asking if you really want to delete the shift. Click “Yes” and the shift will be deleted.

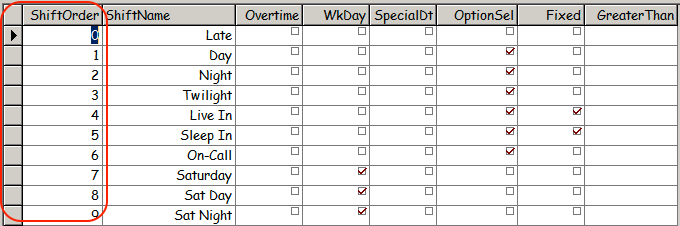
You will now notice that the “ShiftOrder” column, the very first column, will be missing a number.
You will need to correct all of the numbers in this column, starting from 0 at the first shift and continuing all the way up until your last default shift.
To add a new default shift, click the “Add Shift” button near the bottom/middle of the screen.

After you’ve clicked that button you will notice that a new blank shift has appeared in the list above. You will need to overwrite the “ShiftName” field with a name of your choice, and select any of the options from the other fields that you feel fit the needs of your new shift.
Adding Default Times To Your Default Shifts
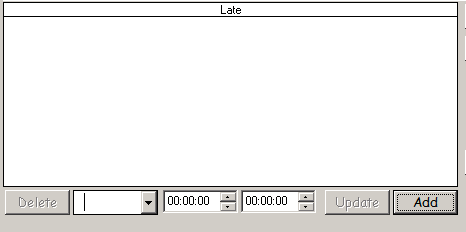
You can now add default times to your shifts. To do this you will first need to select the shift from the list above.
Once you’ve selected your desired shift, you need to select a day and the time span for that shift. These options are located at the bottom of the window. Once you’ve added the correct time span for that day, click the “Add” button.
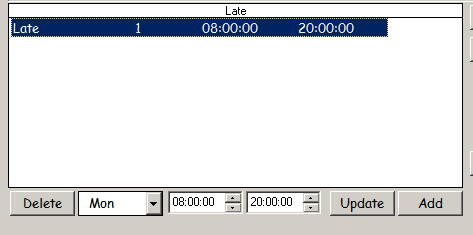
The new shift time will show up in the list above.
If you’ve made a mistake with the times, you can update the values by clicking on the shift time, changing the values in the boxes below the list, and clicking the “Update” button.

If you no longer need a shift time or you wish to start over, you can delete a shift time by selecting the shift time and clicking the delete button.
The shift time will now be removed from the shift time list above.
You will need to add shift times for every day of the week, so you will need to repeat the process of adding shift times until you have reached “Sun” in the drop down box.

You will also need to repeat this process for every ShiftName.
Once you’ve finished creating the section and you’re happy with it, you can now move on to adding clients (click here for information on adding new clients), then adding pay rates ( click here for information on adding new pay rates) so that you can start to put bookings in the system under the new section.