Frequently Asked Question
How do I upload scanned files to Pulse?
Last Updated 8 years ago
On your welcome email you should have a link and some login details for our FTP site, which allows you to upload files to our servers.
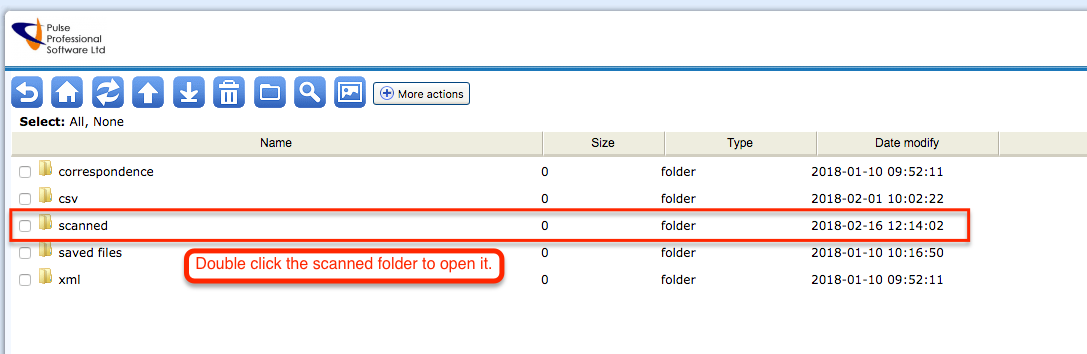
Once you have logged into the site you should see some folders. Look for the scanned folder and double click it to open it.
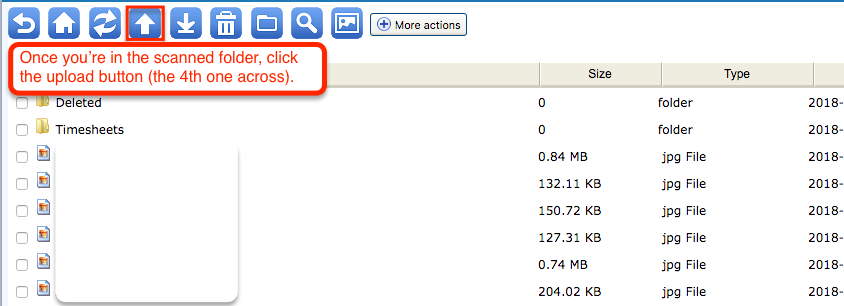
Once you're in the scanned folder you can start the upload process. First click the Upload button.
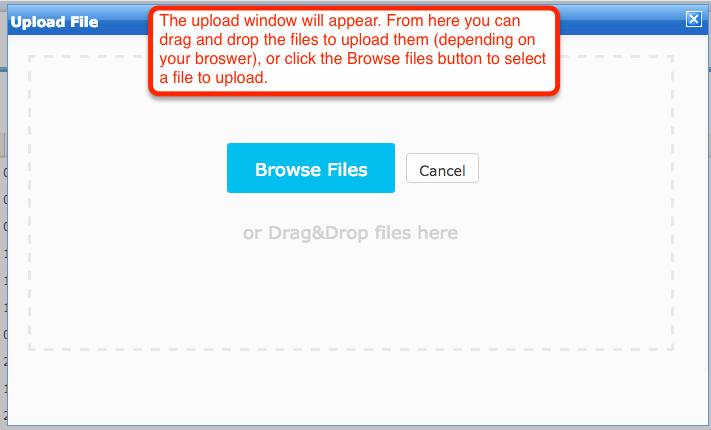
The upload window will appear allowing you to either drag and drop files to upload them (depending on your browser) or browse for files on your PC. We'll use the browsing method for this example. Click the Browse Files button.
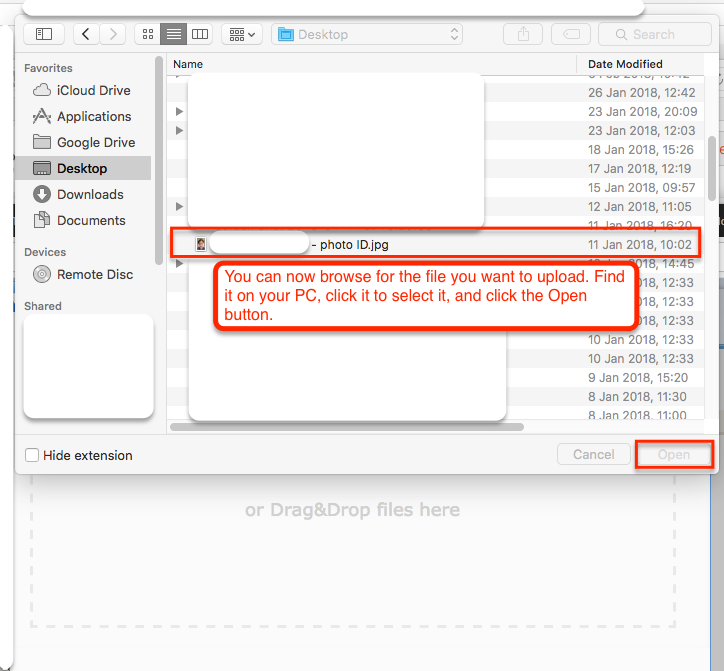
Your explorer window should then appear allowing you to browse through the files on your PC. Look for the file you want to upload, click it so it's selected, then click the Open button (this may vary depending on your operating system). You can also select multiple files at once by holding the Shift key on your keyboard and clicking the files you want to upload. When you then click the open button it will upload every file you have selected.
When you've done that, the upload window should update to reflect the status of the upload. If it says upload succeeded then you can close the upload window so you're back to the scanned folder. If you look through the scanned folder list you should now see the file you uploaded.
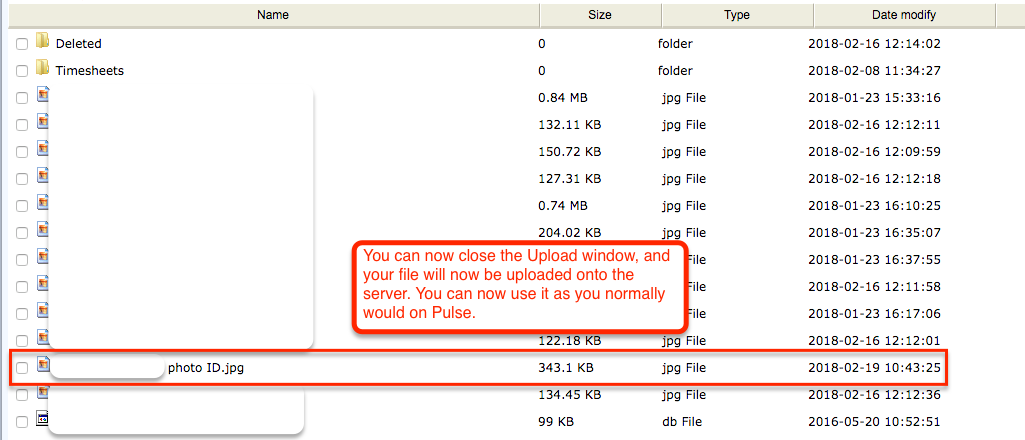
You can now use the file as you normally would within Pulse.
Please note, the system does accommodate one level of folders within the scanned folder. For example, you can have a folder called "John Smith" for the staff name which contains all of their scanned documents, but you cannot have another folder within the John Smith folder or the system will not pick it up and you won't be able to access any of the files within it when you come to link the scanned documents.
Once you have logged into the site you should see some folders. Look for the scanned folder and double click it to open it.
Once you're in the scanned folder you can start the upload process. First click the Upload button.
The upload window will appear allowing you to either drag and drop files to upload them (depending on your browser) or browse for files on your PC. We'll use the browsing method for this example. Click the Browse Files button.
Your explorer window should then appear allowing you to browse through the files on your PC. Look for the file you want to upload, click it so it's selected, then click the Open button (this may vary depending on your operating system). You can also select multiple files at once by holding the Shift key on your keyboard and clicking the files you want to upload. When you then click the open button it will upload every file you have selected.
When you've done that, the upload window should update to reflect the status of the upload. If it says upload succeeded then you can close the upload window so you're back to the scanned folder. If you look through the scanned folder list you should now see the file you uploaded.
You can now use the file as you normally would within Pulse.
Please note, the system does accommodate one level of folders within the scanned folder. For example, you can have a folder called "John Smith" for the staff name which contains all of their scanned documents, but you cannot have another folder within the John Smith folder or the system will not pick it up and you won't be able to access any of the files within it when you come to link the scanned documents.