Frequently Asked Question
Setting Up and Editing Staff Documentation
Last Updated 8 years ago
Within Pulse you can create a default list of documents that are always added to all employees. You can also create standalone documents for one staff member.
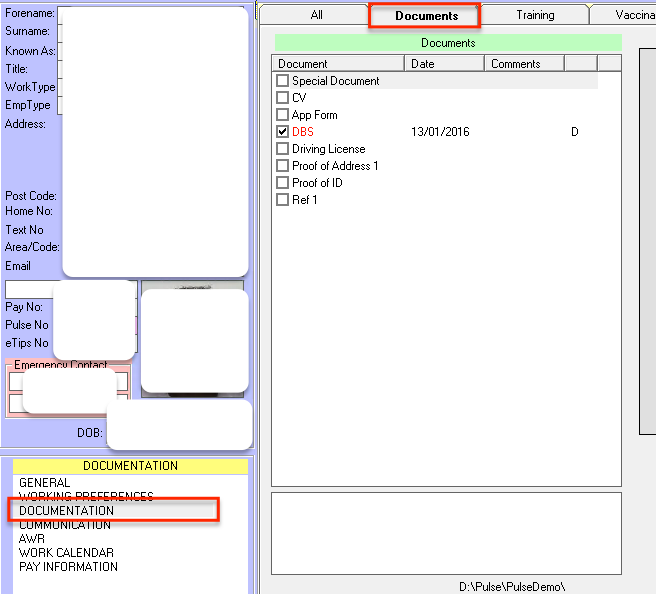
To create a new Document Type, go to a staff member's Staff Details page and go to the Documentation page.
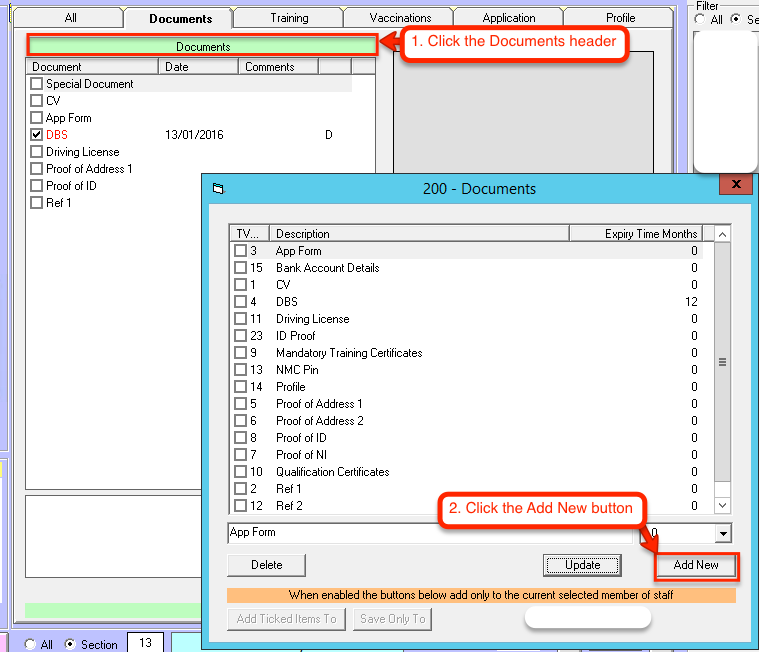
Click the green header labelled Documents. The Documents window will appear. In here, click the Add New button to begin the process of adding a new document type
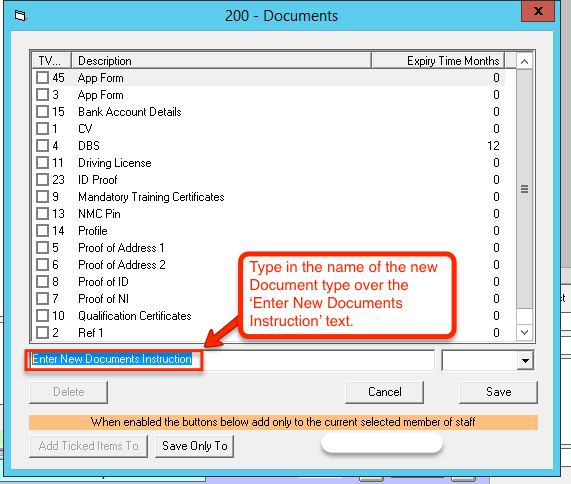
You will now need to overtype the temporary text with the name of your new document type.
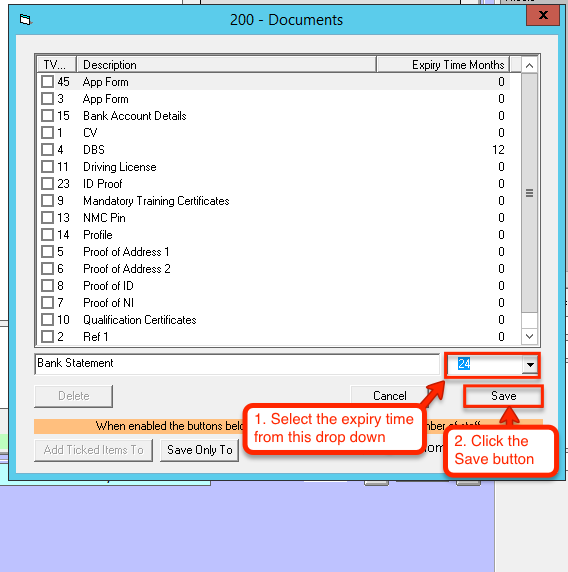
Choose the expiry time (in months) from the drop down box. Click the Save button.
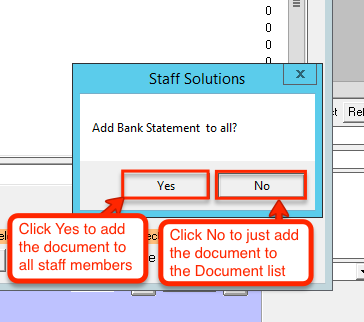
You will now need to choose whether or not the document type will be added to all staff members, or if you just want to save it to the list so you can manually add it to a single staff member at a later date.
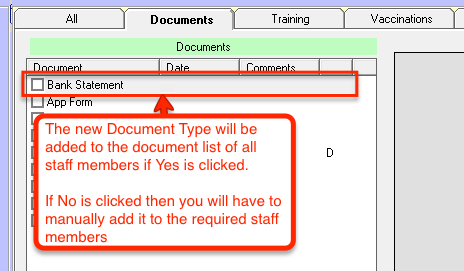
If you clicked 'Yes' the new document will appear in all the documents on each staff member. If you clicked 'No' it will be in the documents sub form ready to be added.
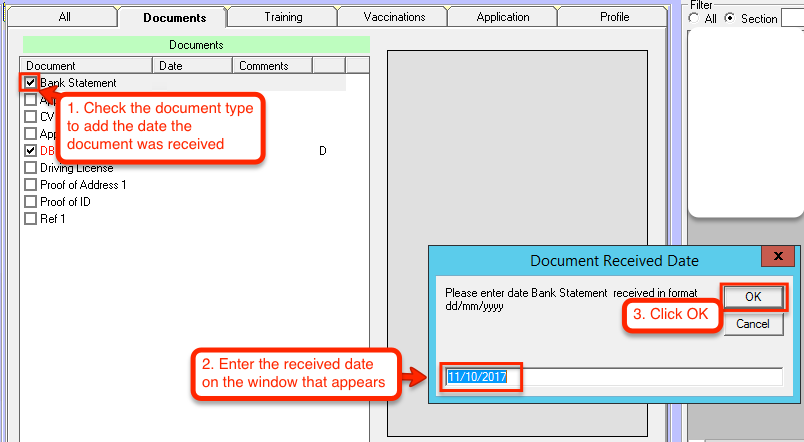
Tick the box next to the document type to add a received date.
To upload a scanned document to the newly added document, first go to Communication -> Scanned Letters.

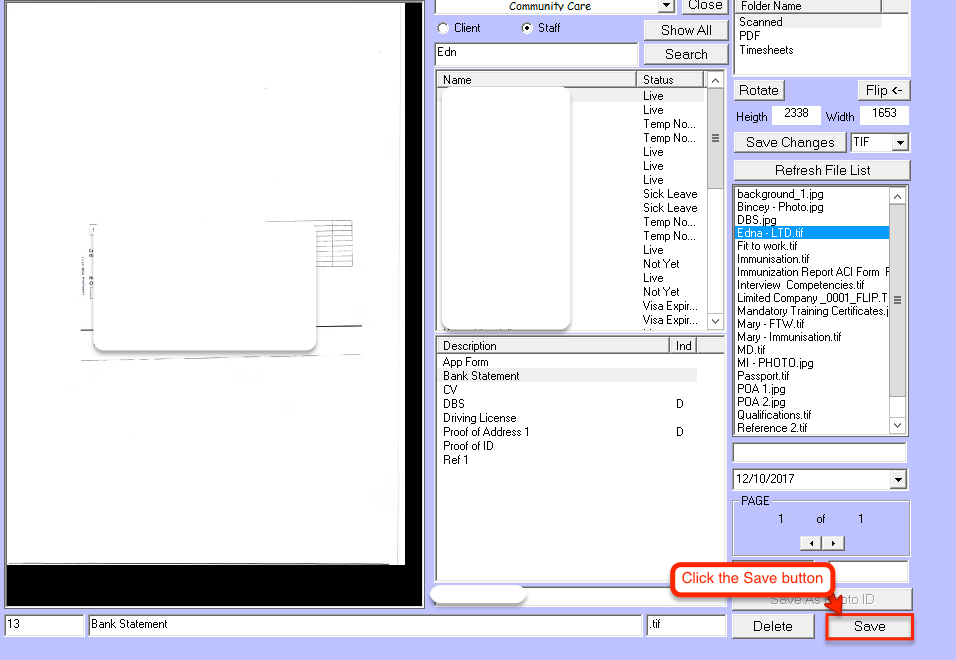
Find the staff member from the list, or use the search bar. Select the staff member so they are highlighted. Click the folder where you uploaded the scanned file. Select the document type in the bottom list. Select the file from the list on the right.
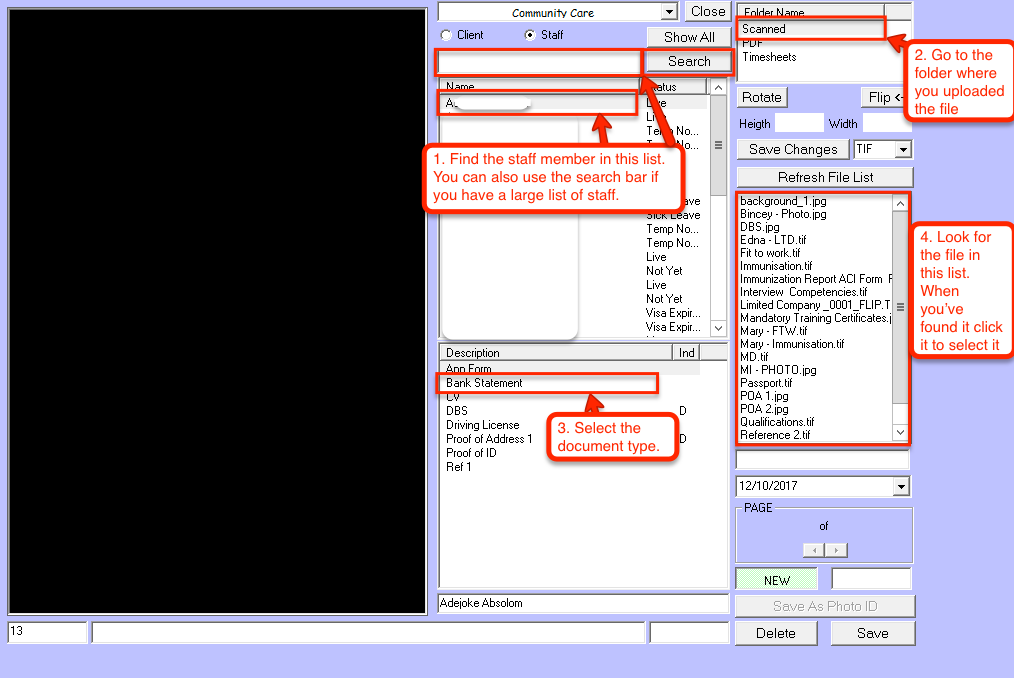
Ensure that the document displays on the preview window on the left. Click the Save button.
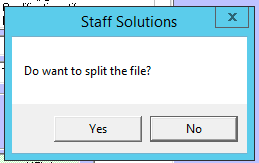
If the document contains multiple pages, you can choose to split the file into separate files. (Note: you can still keep the document as one file and still be able to browse through the multiple pages). Click No if you want to keep it as one file.
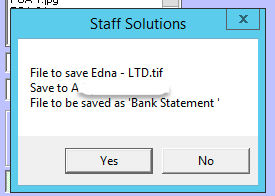
Click Yes to confirm the file save.
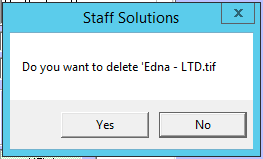
You can choose to delete the originally uploaded file, or you can keep it if you want it as a backup.
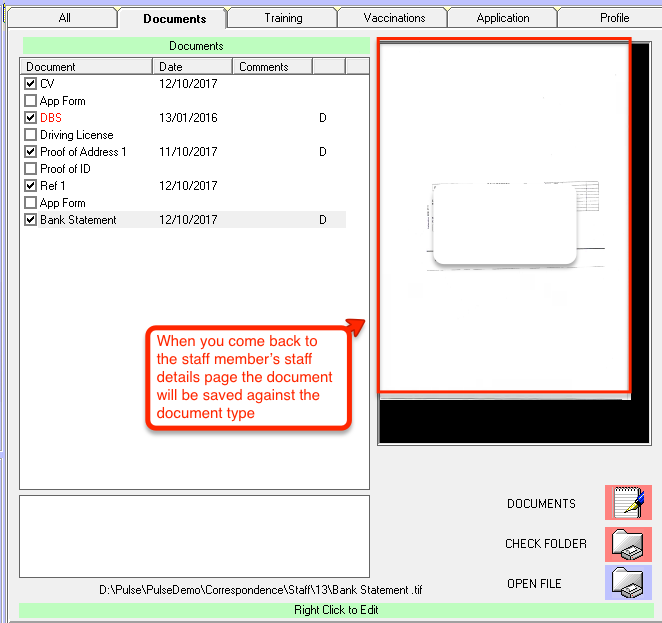
When you go back to the staff member's page and check their documents, the file should now be saved against the document type.
If you want to view the pages of a document that has multiple pages, double click the preview window of the document and the document will appear. You can navigate through the pages using the arrow buttons at the bottom right of the window.
To create a new Document Type, go to a staff member's Staff Details page and go to the Documentation page.
Click the green header labelled Documents. The Documents window will appear. In here, click the Add New button to begin the process of adding a new document type
You will now need to overtype the temporary text with the name of your new document type.
Choose the expiry time (in months) from the drop down box. Click the Save button.
You will now need to choose whether or not the document type will be added to all staff members, or if you just want to save it to the list so you can manually add it to a single staff member at a later date.
If you clicked 'Yes' the new document will appear in all the documents on each staff member. If you clicked 'No' it will be in the documents sub form ready to be added.
Tick the box next to the document type to add a received date.
To upload a scanned document to the newly added document, first go to Communication -> Scanned Letters.
Find the staff member from the list, or use the search bar. Select the staff member so they are highlighted. Click the folder where you uploaded the scanned file. Select the document type in the bottom list. Select the file from the list on the right.
Ensure that the document displays on the preview window on the left. Click the Save button.
If the document contains multiple pages, you can choose to split the file into separate files. (Note: you can still keep the document as one file and still be able to browse through the multiple pages). Click No if you want to keep it as one file.
Click Yes to confirm the file save.
You can choose to delete the originally uploaded file, or you can keep it if you want it as a backup.
When you go back to the staff member's page and check their documents, the file should now be saved against the document type.
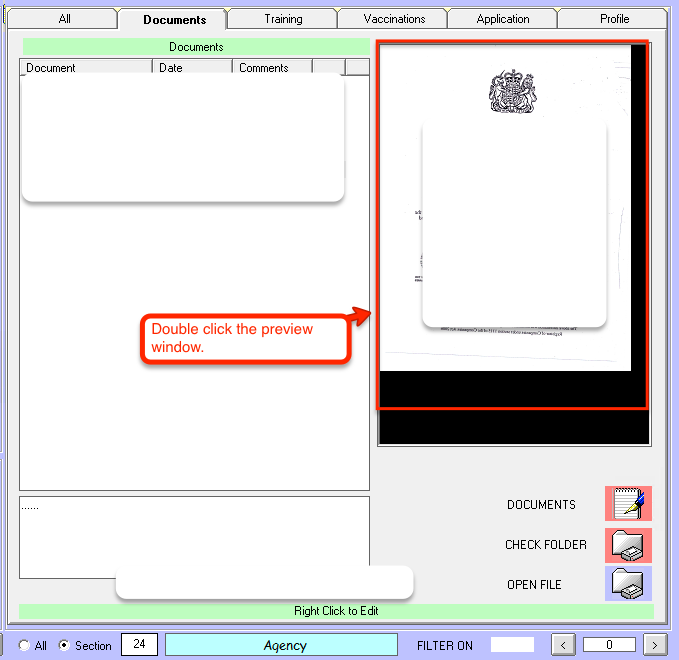
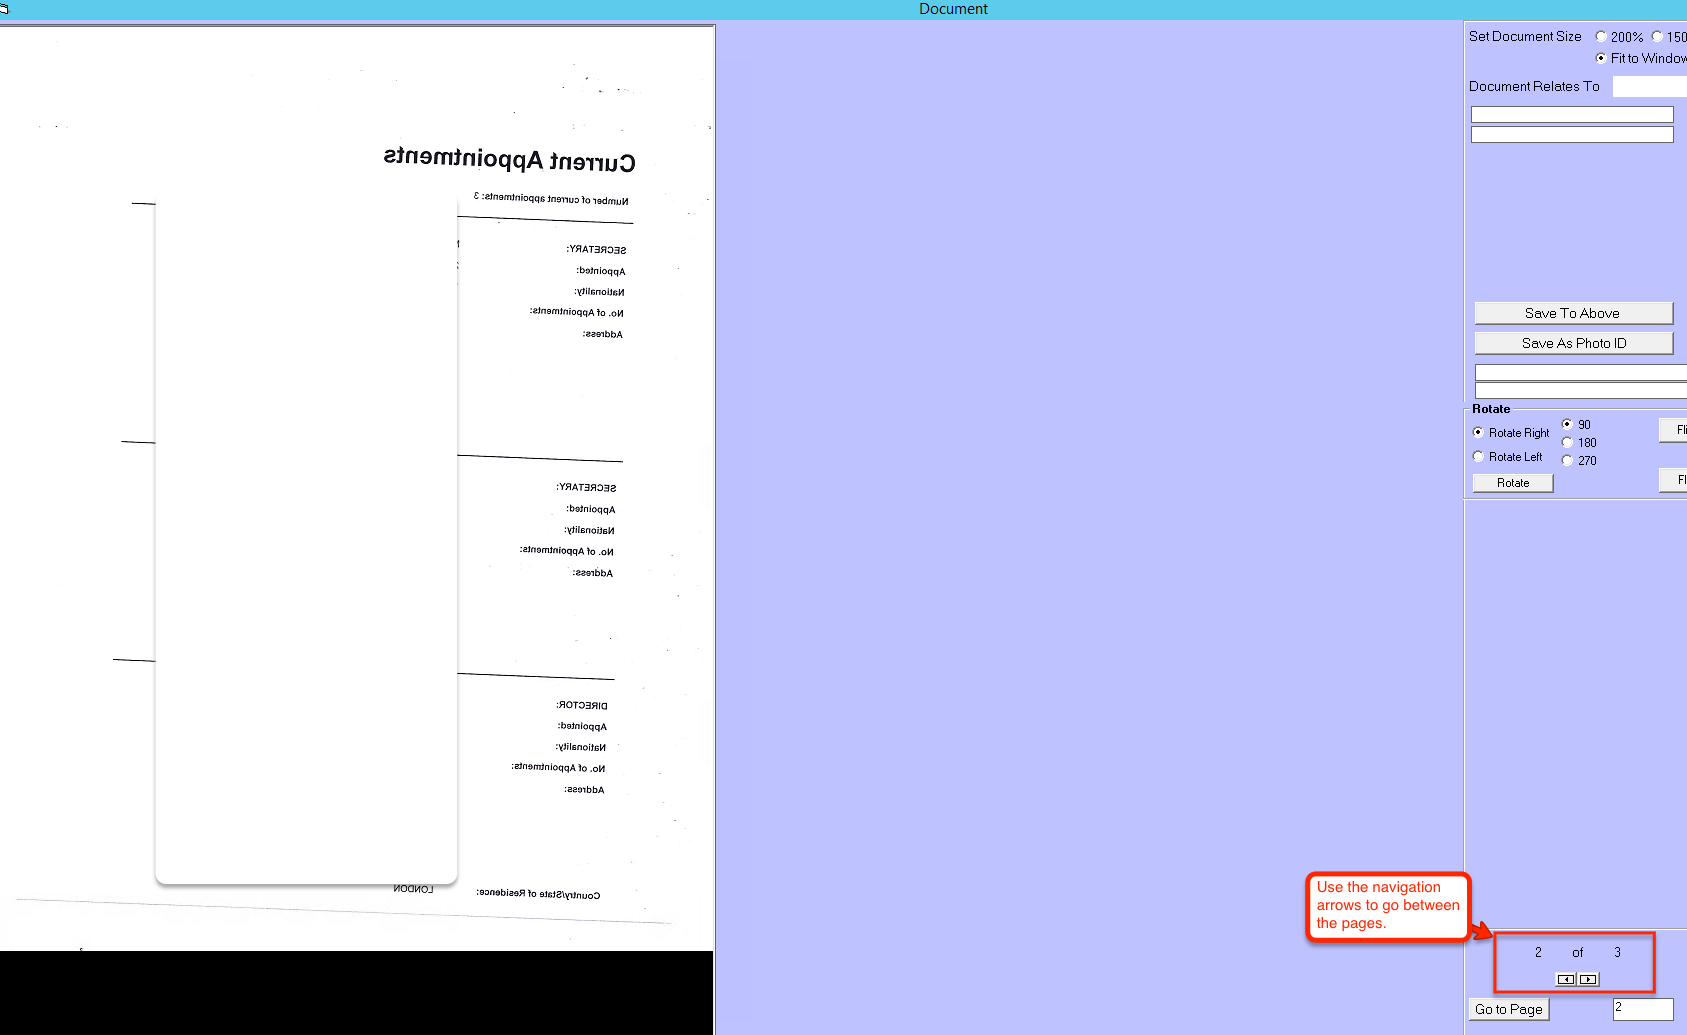
If you want to view the pages of a document that has multiple pages, double click the preview window of the document and the document will appear. You can navigate through the pages using the arrow buttons at the bottom right of the window.