Frequently Asked Question
Adding New Groups, Clients, and Locations
Last Updated 8 years ago
Go to the 'Main' menu and then select 'Clients'.

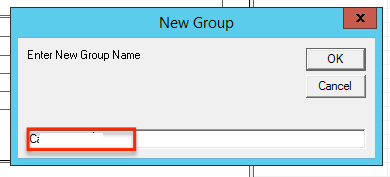
Type into the text box what you want the name of the group to be. This could be based on location, i.e group called 'London' and all clients in the group are based in London.
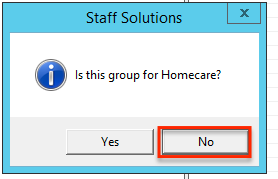
Is the group for home care or not? Click Yes or No. Generally they are not.

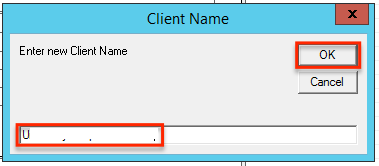
Type in the name of the new client, then click OK.
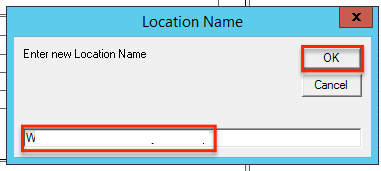
Type in the new location name, then click OK.
The new location will now appear under the client.
You now need to setup the Invoice address and the Group Level.
Firstly you must decide where the invoices are to go to.
You must tick 'Tick for Invoice Address' on either the Group level, Client level, or Location level.
Group level is how the pay level is set up. If all clients in a group have the same pay rates, you can setup the group as the 'Group Level'. If all clients have different pay rates but each clients locations have the same rates, you can set the client as the 'Group Level', and if all the client's locations in the group have different pay rates, you set each location as the 'group level'.
Adding a New Group
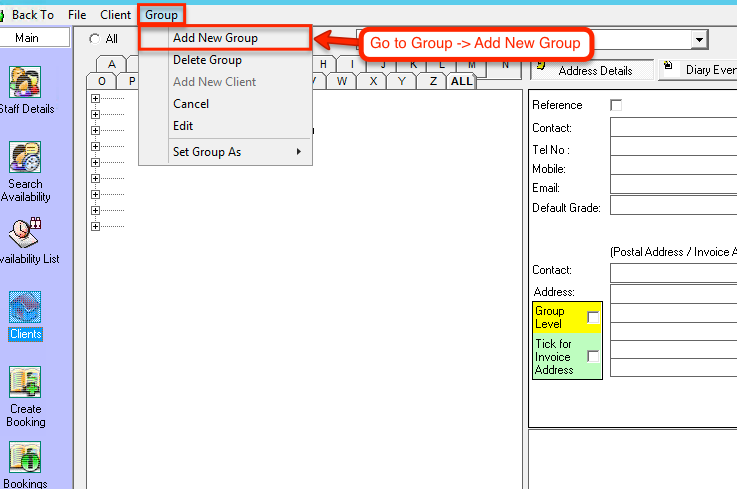
Click 'Group', and 'Add New Group'.Type into the text box what you want the name of the group to be. This could be based on location, i.e group called 'London' and all clients in the group are based in London.
Is the group for home care or not? Click Yes or No. Generally they are not.
Adding a New Client
The new group will now be added to the list. Select the group, right click it and select 'Add New Client'.Type in the name of the new client, then click OK.
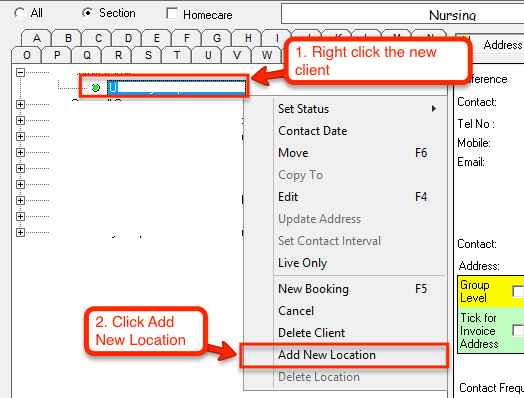
Adding a New Location
The new client will be added. You now need to add a location to the client. If the client is a home, you can use the first line of the address as the location, if the client is a hospital, you can use the ward name as the location.Type in the new location name, then click OK.
The new location will now appear under the client.
You now need to setup the Invoice address and the Group Level.
Firstly you must decide where the invoices are to go to.
You must tick 'Tick for Invoice Address' on either the Group level, Client level, or Location level.
Group level is how the pay level is set up. If all clients in a group have the same pay rates, you can setup the group as the 'Group Level'. If all clients have different pay rates but each clients locations have the same rates, you can set the client as the 'Group Level', and if all the client's locations in the group have different pay rates, you set each location as the 'group level'.