Frequently Asked Question
How can I create an Adhoc Invoice?
Last Updated 8 years ago
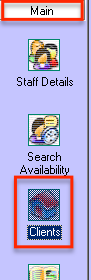
First navigate to the Main section then to Clients
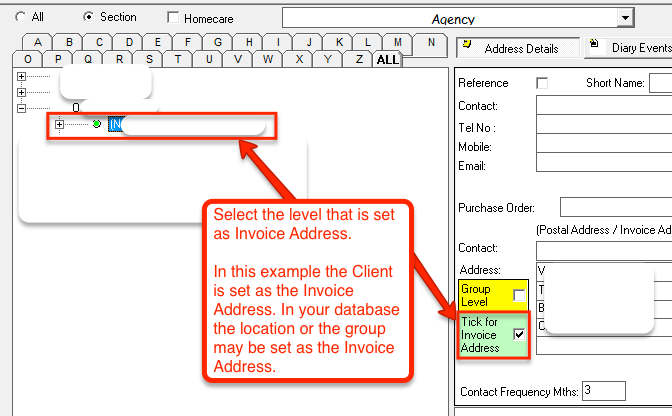
Find the client you want to send the invoice to, then look for the level that is set as "Invoice Address". It may be on the Group, the Client itself, or a location within the client. Once you find it select it so it turns blue.
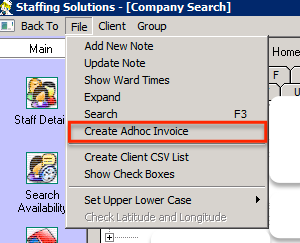
Next, go to File then click Create Adhoc Invoice (Note: if this is greyed out, then you have not selected the correct level, double check that you have selected the level that is set as Invoice Address).
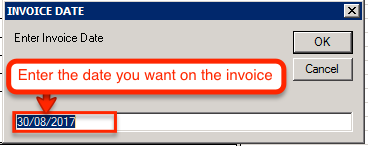
Enter the date you want to appear on the invoice
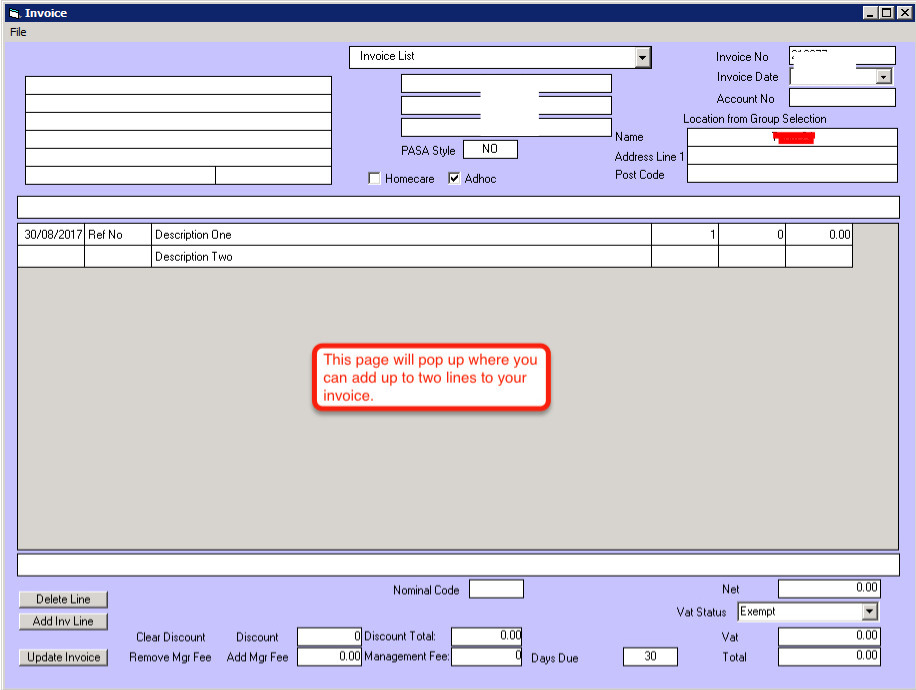
The edit invoice window will pop up signifying that the invoice has been created, take note of the invoice number in the top right of the screen as we will need to find it in the View Invoices page. Close this window then navigate to View Invoices.
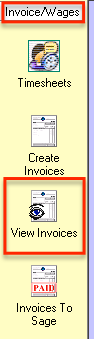
Go to the Invoice/Wages section, then click View Invoices.
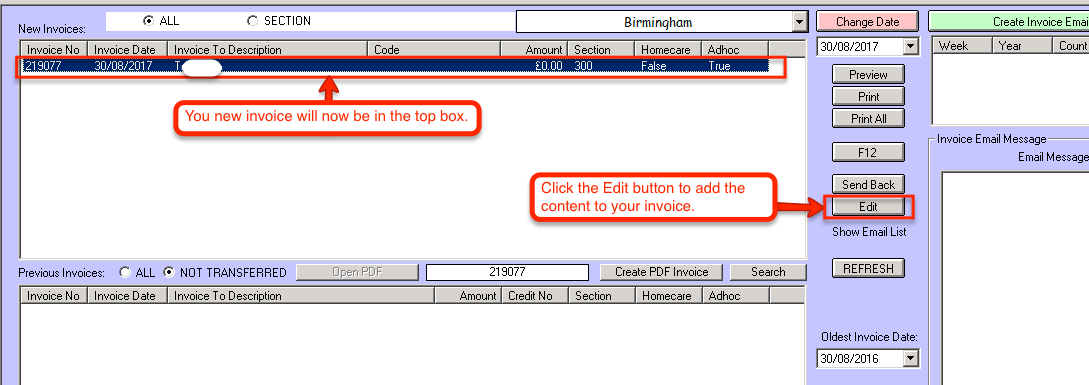
Locate your newly created empty invoice in the top list, select it, then click the "Edit" button.
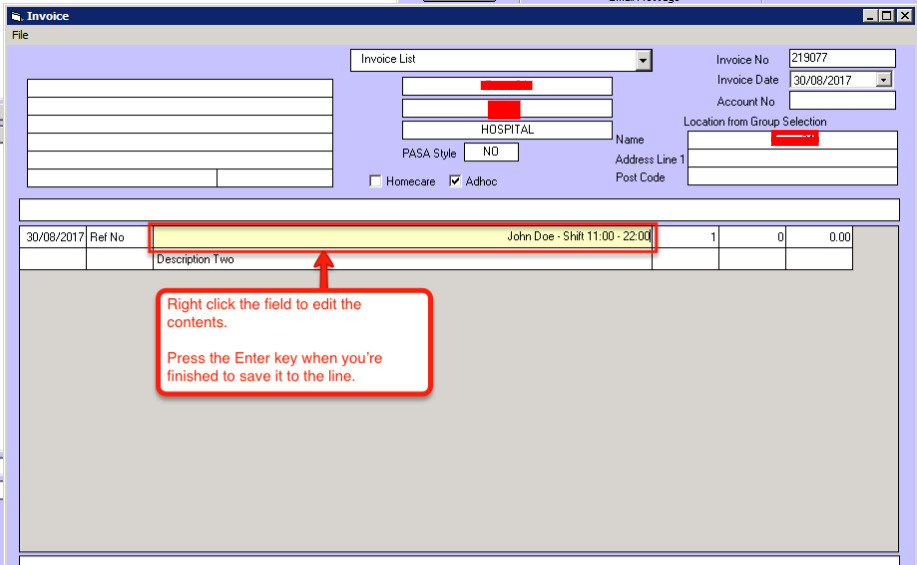
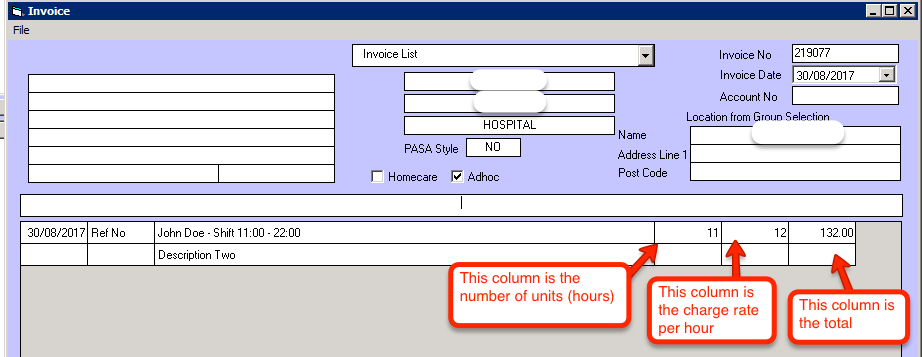
To edit the contents of the Description, Unit, and Rate you must right click the field you want to edit, then if it goes yellow you can start to add your own description, or remove the text all together. To save your changes press the Enter key on your keyboard after each amendment you make.
The 4th column is the number of units, if you're creating an invoice for a shift this will be the number of hours worked. The 5th column is the hourly rate. The 6th and final column is the total of the units and hourly rate, this is worked out automatically after you've entered values in the unit and hour fields. If you're invoicing someone for a one time charge, then you can enter the unit value as 1 then enter the amount you want to charge in the hourly rate column.
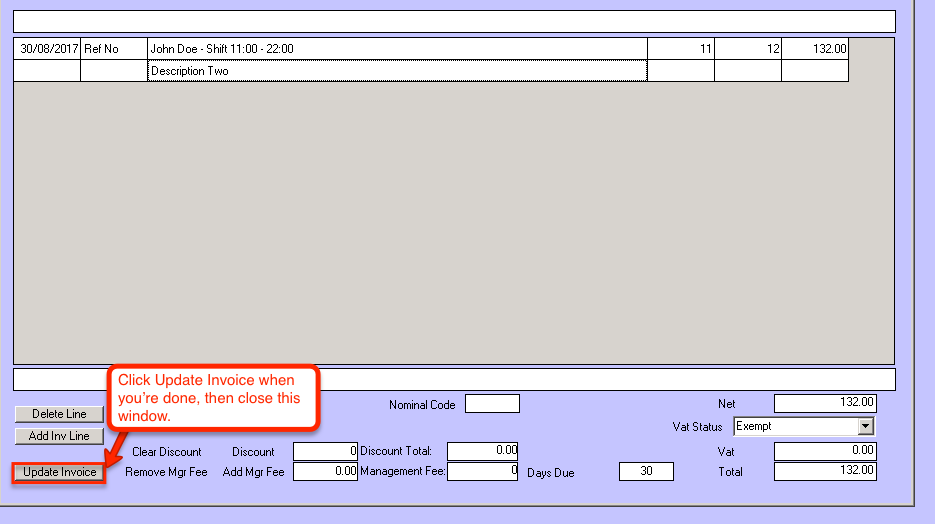
Once you're done editing and adding any required information, click the Update Invoice button in the bottom left of the window to save all of your changes.
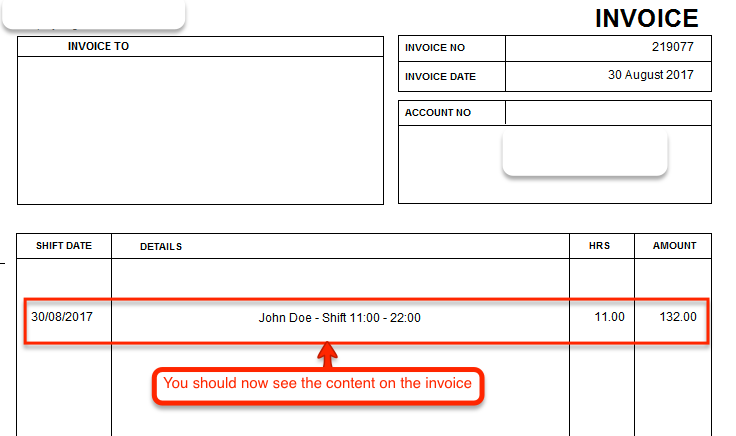
You may need to preview your invoice before you send it off just to make sure that the values and descriptions are displaying correctly. If your description line is overlapping with your Hrs field you may need to utilise the second description line.

This preview window will show up showing exactly what the invoice will look like when printed.
Find the client you want to send the invoice to, then look for the level that is set as "Invoice Address". It may be on the Group, the Client itself, or a location within the client. Once you find it select it so it turns blue.
Next, go to File then click Create Adhoc Invoice (Note: if this is greyed out, then you have not selected the correct level, double check that you have selected the level that is set as Invoice Address).
Enter the date you want to appear on the invoice
The edit invoice window will pop up signifying that the invoice has been created, take note of the invoice number in the top right of the screen as we will need to find it in the View Invoices page. Close this window then navigate to View Invoices.
Go to the Invoice/Wages section, then click View Invoices.
Locate your newly created empty invoice in the top list, select it, then click the "Edit" button.
To edit the contents of the Description, Unit, and Rate you must right click the field you want to edit, then if it goes yellow you can start to add your own description, or remove the text all together. To save your changes press the Enter key on your keyboard after each amendment you make.
The 4th column is the number of units, if you're creating an invoice for a shift this will be the number of hours worked. The 5th column is the hourly rate. The 6th and final column is the total of the units and hourly rate, this is worked out automatically after you've entered values in the unit and hour fields. If you're invoicing someone for a one time charge, then you can enter the unit value as 1 then enter the amount you want to charge in the hourly rate column.
Once you're done editing and adding any required information, click the Update Invoice button in the bottom left of the window to save all of your changes.
You may need to preview your invoice before you send it off just to make sure that the values and descriptions are displaying correctly. If your description line is overlapping with your Hrs field you may need to utilise the second description line.
This preview window will show up showing exactly what the invoice will look like when printed.