Frequently Asked Question
How can I print/send a staff profile to a client
Last Updated 8 years ago
Staff Profile Builder
A tool for creating a nurse profile report piece by piece, using information you have already entered previously in Pulse.- With this tool you can pick and choose which sections of information you want to include in the nurse profile document without having to retype the information you need. You can choose to include training the staff has completed, the status of their vaccinations (whether or not they have received specific vaccinations), the relevant documents that are stored in Pulse, the qualifications the staff has, the different areas of work experience the staff has taken part in, the personal statement, and the National Insurance number.
- You can create a standard of vital training, vaccinations, and documents that is applied to all nurses. This means that these pieces of information are automatically included in the document if they are considered vital. Training, vaccinations, and documents that are considered vital are things that should ideally be already inserted into Pulse. For example, if a Hepatitis vaccination is a vital vaccination that the nurse needs before they work, then you should make sure that all nurses that are working have this vaccination before creating profiles for them.
- The tool allows you to enter a personal statement for the nurse as plain text. This can be created by you, or copied from a personal statement provided by the nurse themselves.
- You are also able to export the document as a PDF file for use outside of Pulse. The PDF file is a version of the document that can be viewed in full quality, but not edited. You can use this version of the document to be saved as a backup, or sent to other people using your method of choice.
- You can send the profile document to any clients you have stored in pulse via email. The email is automatically built for you, including header, body, recipient, Cc, and attachment (the profile document). You can edit the information within the email and send it from Pulse. You can add multiple recipients, so it is possible for you to send a copy of the email to yourself to ensure that it is what you want.
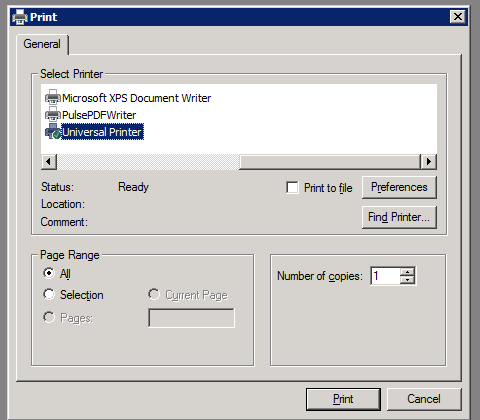
- The tool has a printing facility that enables you to print the document from within Pulse, assuming you have a default printer set up.
- You are able to switch the position of the staff image and your company logo from left to right.
- You are able to zoom into the document while editing it and after you have exported it.
How To Load The Report Builder
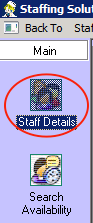
To find the nurse profile builder, first navigate to the “Staff Details” section.
Once you’ve opened this section, look for the nurse list on the right side of the page.

From this list, you can select a nurse and their information is automatically loaded in the middle of the screen.
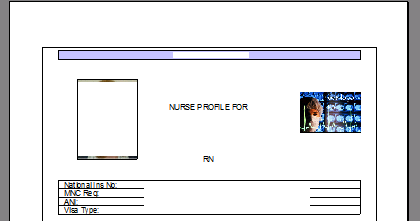
Once you’ve selected the nurse, click the “Staff Details” tab. From the menu, click “Staff Profile Creation". The profile builder will now load.
Once the profile builder loads you will see this screen.
Adding Vital Information To The Document
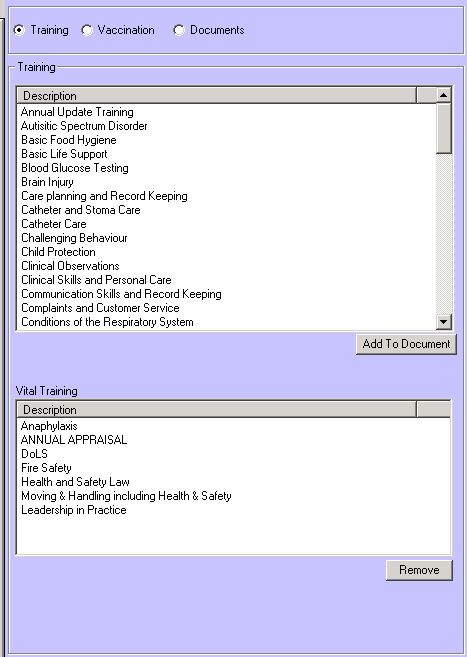
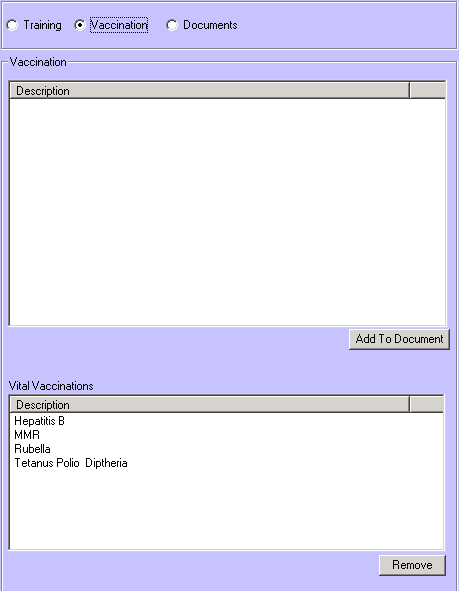
The right hand side of the screen allows you to select which types of training, vaccination, or document is considered “vital”. If a piece of information is vital and the nurse has that piece of information associated with them, it is added to the nurse profile document.You can switch between lists by clicking the corresponding radio buttons at the top of the screen.
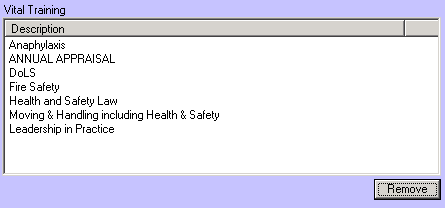
The top list, entitled "Training", "Vaccination", or "Documents" depending on which radio button you have clicked, contains every type of training, vaccination, and document.
The bottom list is the information that you have set as vital.
To set a piece of information as vital select it from the top list, then click the “Add To Document” button.
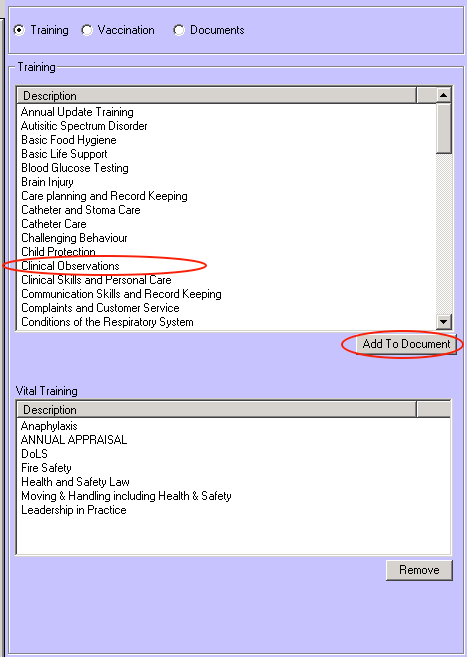
You will notice that the information has now appeared in the lower list.

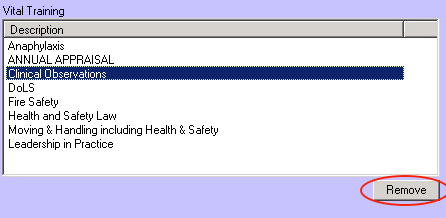
You can always remove items from the vital list by clicking the item you want to remove then clicking the “Remove” button.
You can also use this feature with Vaccinations and Documents

Adding And Removing Sections
You can remove and add sections from and to the report document. To do this, check the checkbox of the sections you want to include in the report, and uncheck the sections you want to leave out of the report document, then click the “Refresh” button.

Exporting The Document As A PDF
You can export the document as a PDF file. To do this, click the “Export to PDF” button.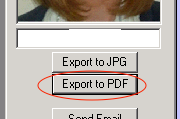
If the document was able to be created successfully then you will receive this message

After you dismiss the message, you are able to view the PDF within the system. To do this, navigate to the “PDF Profile” tab.

After clicking the tab, the PDF document will load.
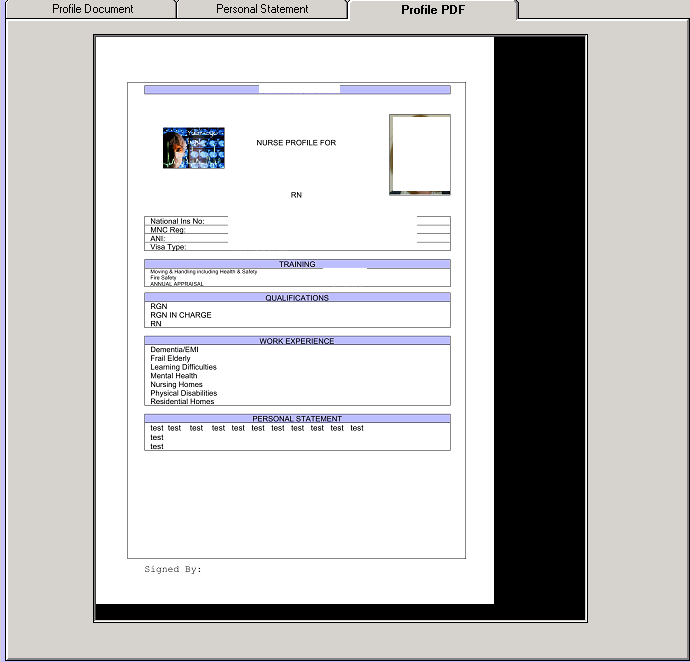
You are able to zoom into the PDF document by drawing a square around the area in which you wish to zoom. This should give you a closer look to see if there are any areas where there are mistakes or problems with the document.
Emailing The Document To Your Clients
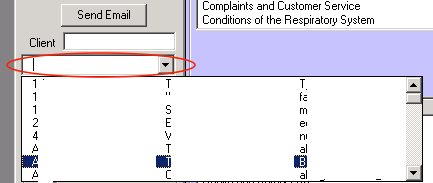
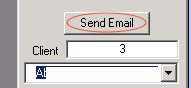
Another feature is emailing the profiles to any of your clients from within the system.To do this, select your desired client from the dropdown list.
After you have selected the desired client, click the “Send Email” button
The following screen will then load, allowing you to add more recipients, change the subject, and change the body of the email before you send it. Please note that the nurse profile PDF is automatically attached to the email.
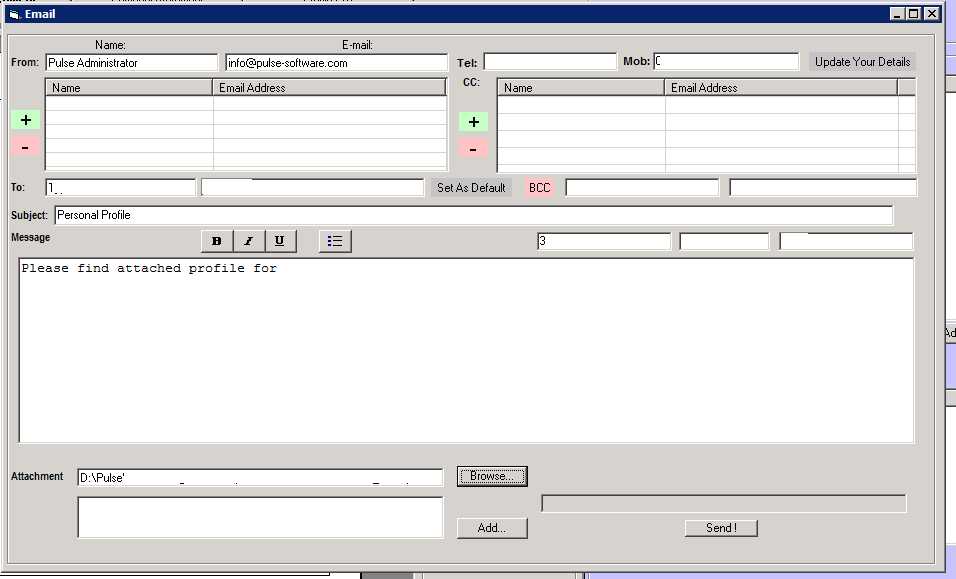
To send the email, press the “Send” button.
At default, the layout of the email includes a footer containing your details that have been automatically taken from Pulse, as well as automatically created disclaimers. Below is an example of how the email looks on the receiving end. Please note you can edit the email as you wish using the tool.

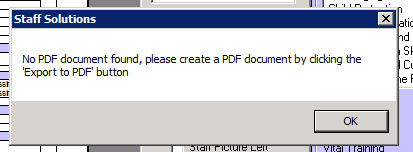
Please note that if you try to send the email before exporting the file as a PDF, the system will stop you and explain what to do
Repositioning The Images
You can change the position of the staff picture by clicking the “Staff Picture Left” box.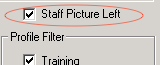
Printing The Document
You can print the document from the system by clicking the printer icon, then using your desired printer. To use the printing functionality you need to ensure that you have set up your printer as the default printer on your personal machine.
Editing The Personal Statement
You can edit the staff’s personal statement by clicking the “Personal Statement” tab, then editing the text on the page, then clicking the “Save” button.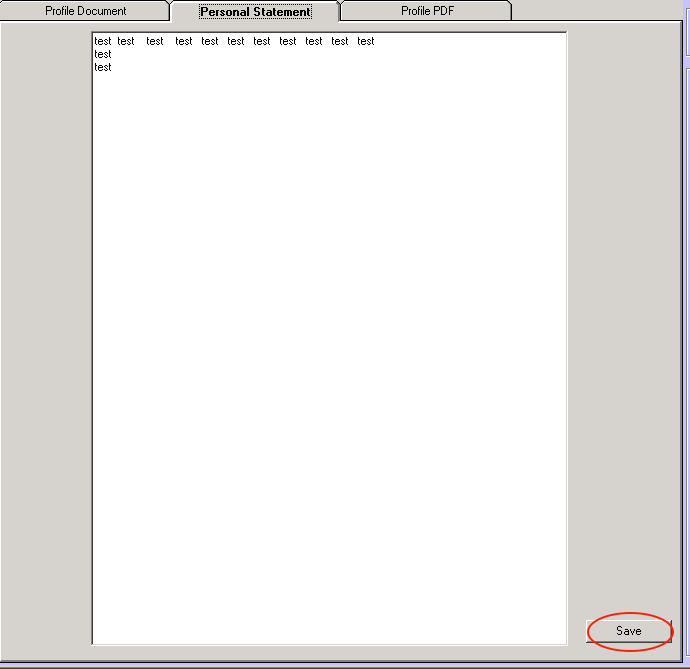
Multiple Page Documents
Occasionally the document will be more than one page long. In that case, you can scroll through each page using these controls at the top of the window. The normal arrows skip forward or backward one page, the arrows with the line skip to the end of the document and the start of the document.
Zooming
You can use the zoom feature to enlarge the image to have a better look at the text on the document. To do this, first click the dropdown arrow next to the magnifying glass icon.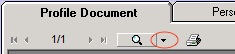
Next click the desired percentage by which you want to zoom into the image.
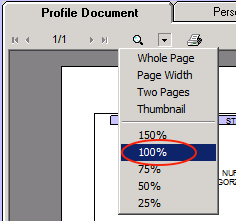
After clicking your desired zoom percentage, the document on the screen will now be zoomed in, or zoomed out depending on your choice.